Learning Modding Concepts
In this tutorial, you will learn the basics of systems like inheritance and blueprints, which are essential for creating advanced mods in Space Marine 2. By the end, you'll have a mod that makes characters in the game change size every second.
To focus on new theory, we'll assume you've completed the Quick Start tutorial.
-
Open the
pc_marine_base_authority.clsfile. This is the parent class for all marine characters in the game.Theory
You can learn more about this file in the Inheritance section.
-
Find the
Prop Blueprintsproperty, click + , selectBlueprint Client, and click Apply.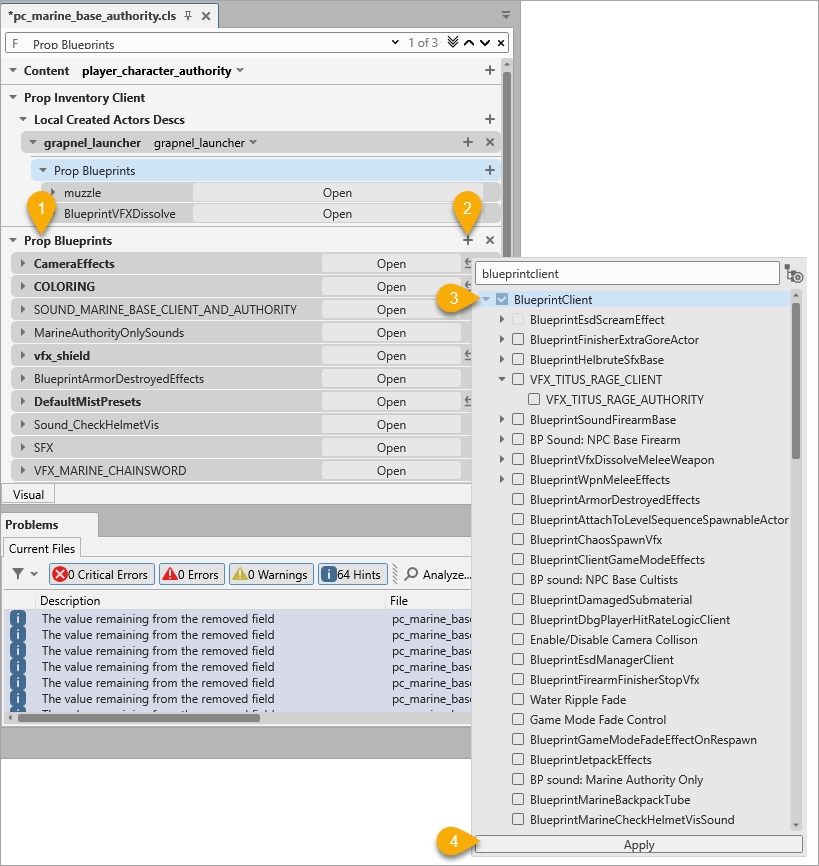
-
Give your blueprint a meaningful name that reflects its purpose – in this tutorial, we'll call it
DynamicScale.
Info
Blueprints are logic scripts that let you define advanced behaviors without writing raw code. Think of them as visual flowcharts, or graphs: they react to events, execute logic, and update variables.
-
Expand the newly created blueprint entry to see the
NodesandVariablessections.Nodesis a service section you won't need, butVariablesis where you'll add the values used by the blueprint. Just like you added the blueprint, add a newBool(boolean) variable calledIsBig.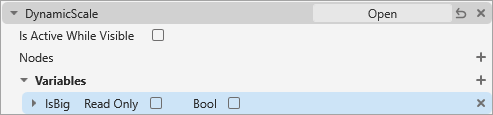
-
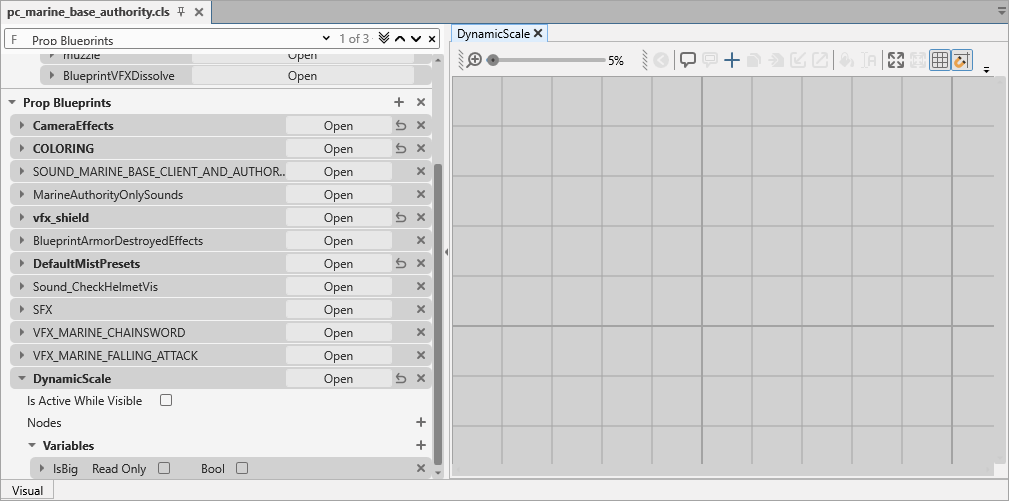
To edit the blueprint, click the Open button next to its name. This will launch the blueprint graph editor.
Tip
You can learn more about how the game’s logic works by opening existing blueprints and exploring them. For example, open the
COLORINGblueprint and navigate the graph with your mouse. Use your mouse wheel to zoom in/out. Drag nodes around for better visibility. -
Add the first node of our
DynamicScaleblueprint: right-click anywhere on the grid in the blueprint editor and select theOn Initnode from the menu.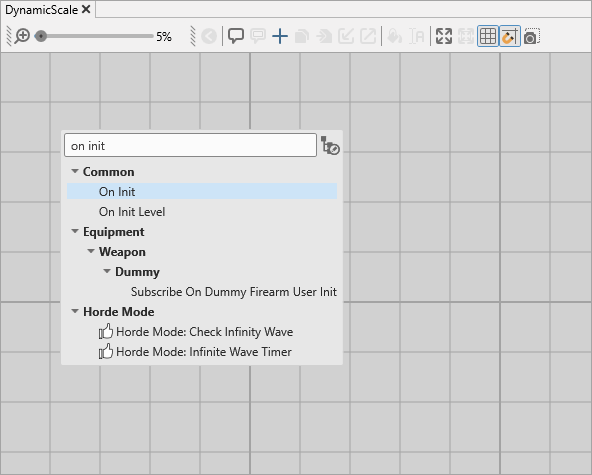
Theory
The
On Initnode starts the blueprint logic when your actor (character) is created in the game. As we want every actor to begin this behavior as soon as it spawns, we start our graph with this node. -
Add the second node as a continuation of the first: click and drag from the red square on the right side of the
On Initnode.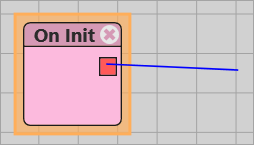
When you release the mouse button, the node menu will appear. This time, select the
Schedulenode, then selectStart.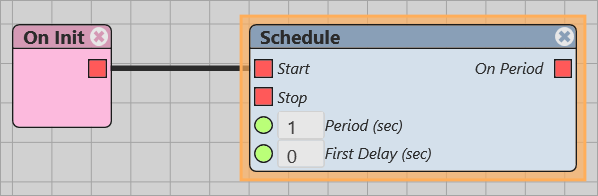
Theory
Let’s break it down. Pink nodes represent events, like
On Init, which triggers when the actor is initialized. Each graph can only have one node for a specific event.Red squares in the nodes are execution pins that define the order in which nodes run. When
On Inittriggers, it starts the blueprint's scenario, which — through the connection you made — immediately starts theSchedulenode's execution. TheSchedulenode sets up a repeating sequence: once started, it runs the node connected to itsOn Periodpin every specified number of seconds (by default, every 1 second). -
Next, define when the schedule execution should stop. Drag a connection from the
Stoppin of theSchedulenode and select theOn Terminateevent node. This ensures the schedule stops when the actor is removed from the game.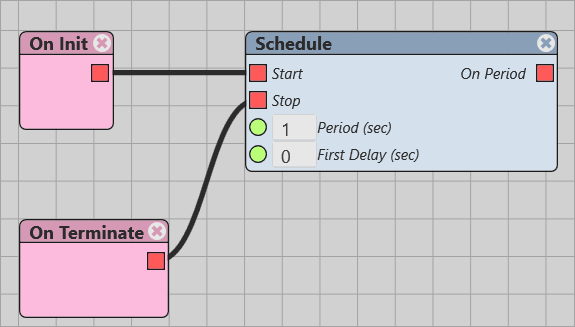
Tip
When you draw a connection from a node, the editor will suggest only suitable nodes that can possibly follow this node.
-
Now recreate the rest of the blueprint graph as shown below to complete the behavior:
- If: checks a
Conditionand triggers one of two nodes depending on whether it'sTrueorFalse. -
Get BP Variable: retrieves a blueprint variable's value. This is a getter node: it has no execution pin and simply returns a value requested by another node. In our example, it gets the value of
IsBig, the boolean variable you created in Step 3. A newBoolvariable isFalseby default (unchecked box).Tip
To quickly access a list of all values available in a field, click ... next to it.
-
Set Geom Scale: sets a custom value for the
Scaleproperty of a given actor.
Leave the default valueOWNER(which refers to the current class). Enter a smaller value in the node that runs whenIsBig = Trueand a larger value in the node forIsBig = False. -
Update BP Variable: updates a blueprint variable’s value. In our case,
InBig.
After increasing the actor's scale, mark theBoolcheckbox soIsBig = True; after decreasing the scale, leave the checkbox unchecked. This way, theIsBigvalue toggles with each iteration of the schedule, switching the actor between big and small sizes.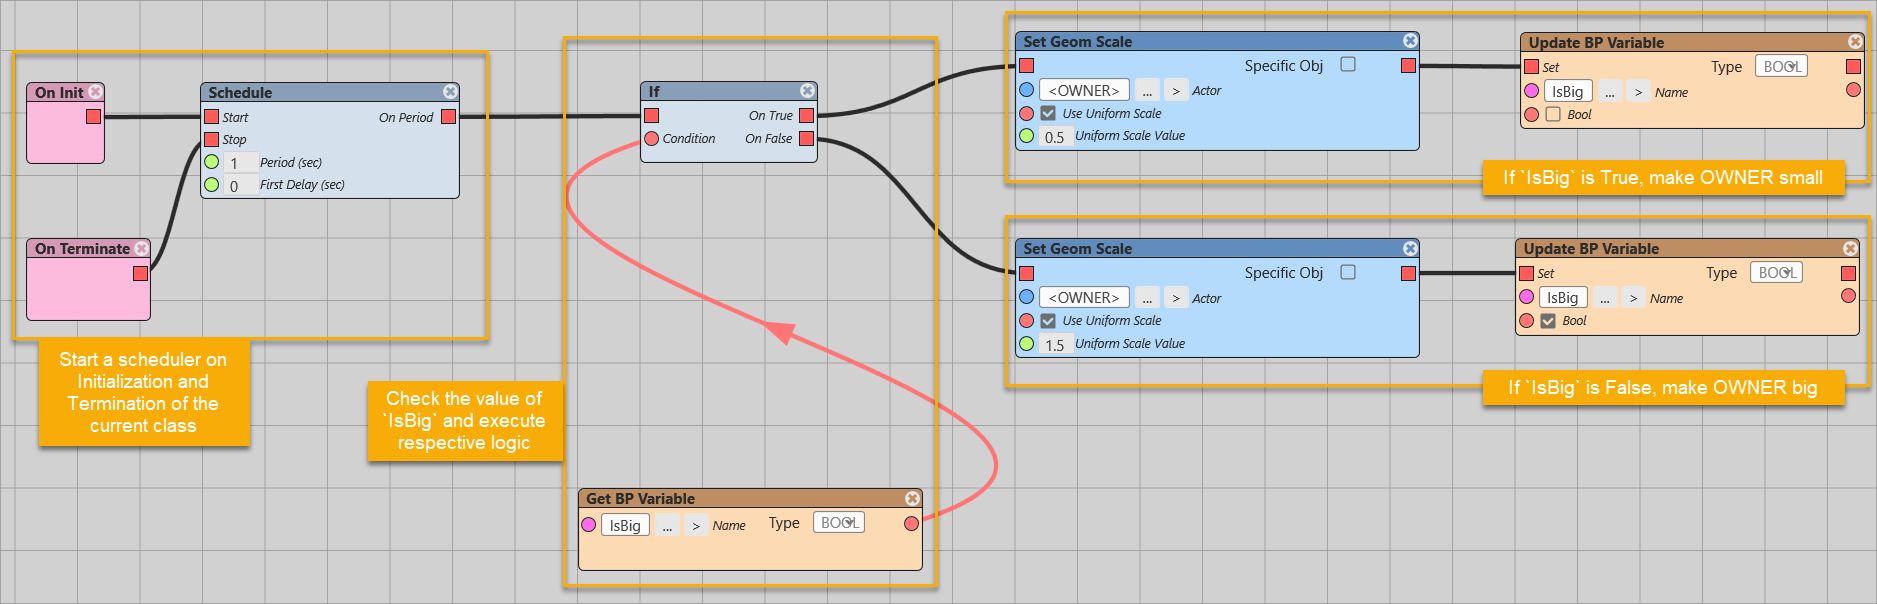
- If: checks a
-
Save the changes in
pc_marine_base_authority.cls. - Copy the modified
pc_marine_base_authority.clsfile and its corresponding.resourcefile as you did in the Quick Start. Note that in this tutorial, the.resourcefile is essential – the mod won't work without it. - Launch the game and watch every character cycle through growing and shrinking every second!
Warhammer 40,000: Space Marine 2 © Games Workshop Limited 2024. Space Marine, the Space Marine logo, GW, Games Workshop, 40K, Warhammer, Warhammer 40,000, 40,000, the 'Aquila' Double-headed Eagle logo, and all associated logos, illustrations, images, names, creatures, races, vehicles, locations, weapons, characters, and the distinctive likeness thereof, are either ® or TM, and/or © Games Workshop Limited, variably registered around the world, and used under licence. Focus Entertainment and its logos are trademarks, registered or not, of Focus Entertainment. Saber Interactive and its logos are trademarks, registered or not, of Saber Interactive. Powered by Wwise © 2006 – 2024 Audiokinetic Inc. Havok software is © 2024 Microsoft. Uses Bink Video. Copyright © 1997-2024 by Epic Games Tools LLC. All rights reserved to their respective owners.